Configuring NZBGet For Access
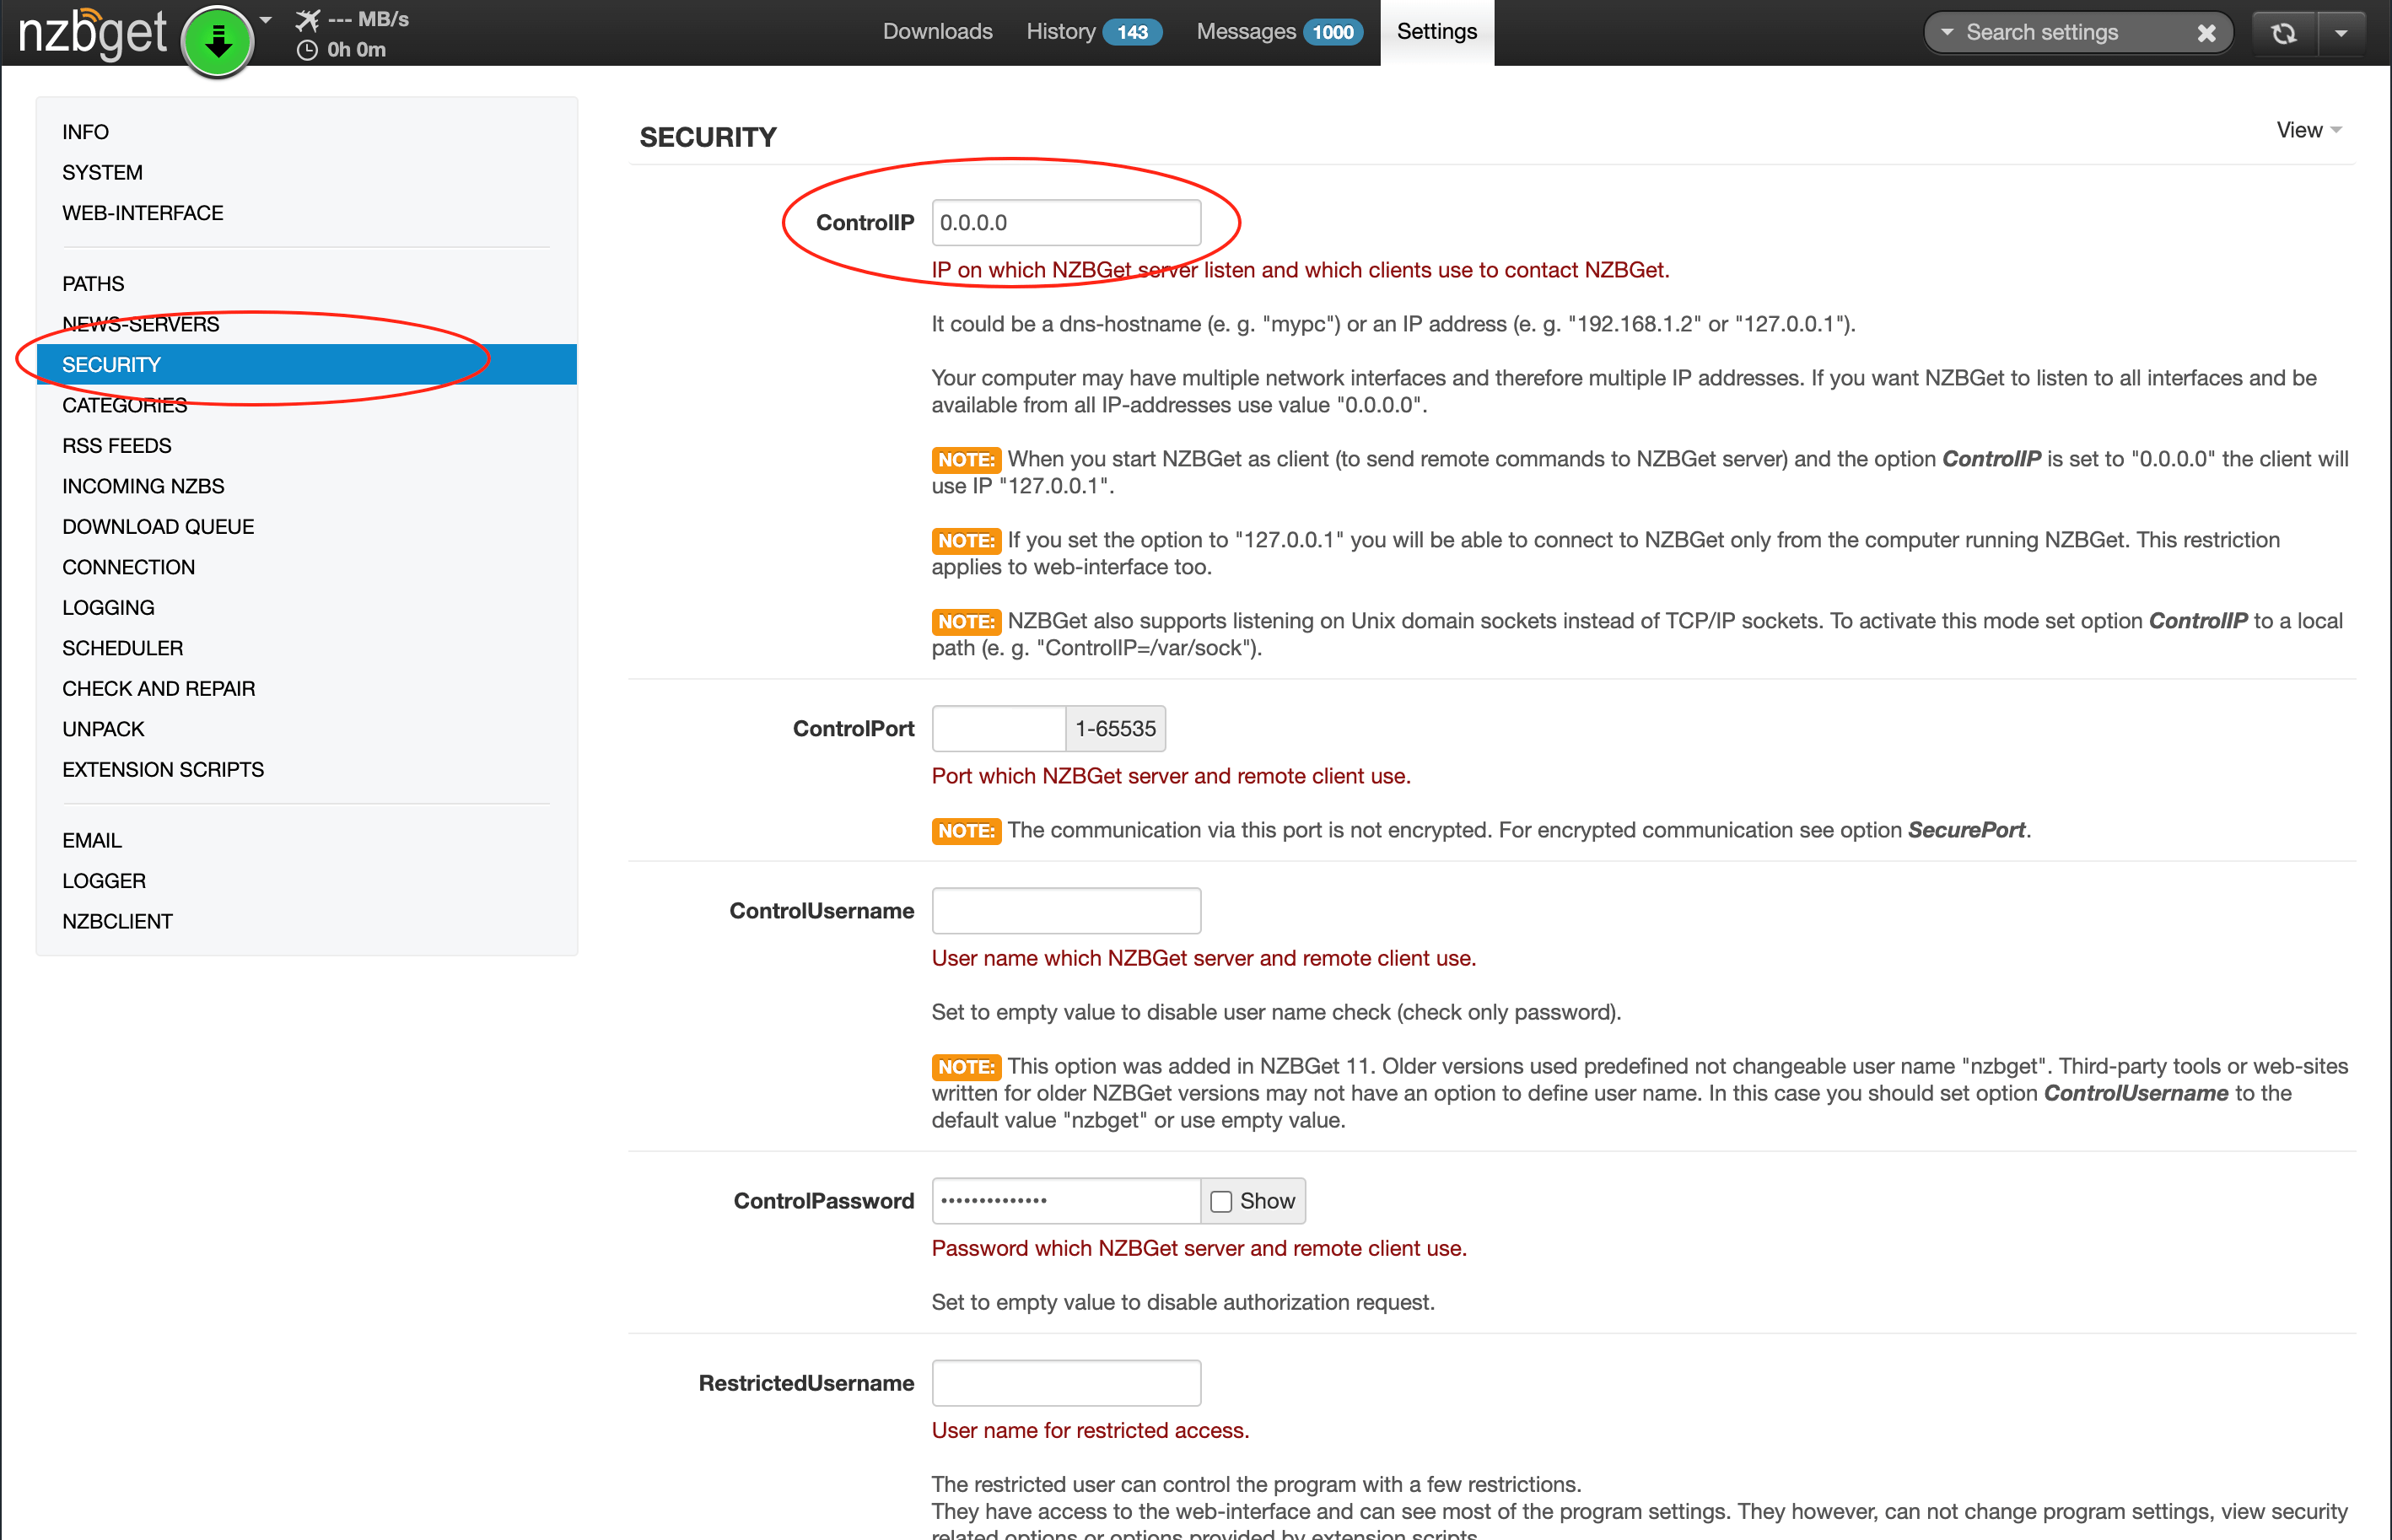
Before you begin, make sure your NZBGet instance is configured for remote access.
- Open your web browser and navigate to your NZBGet instance.
- Go to Settings → Security and verify that ControlIP is set to
0.0.0.0. This allows connections from other devices on the same network.
You'll also need to find the IP address of the computer running NZBGet on your local network.
Note: 127.0.0.1 is your computer's local loopback address and is not accessible from other devices on your network. 0.0.0.0 is a configuration setting, not an IP address. **Do not use either of these addresses in NZBClient.**
Adding a Server

To add a server:
- Open the NZBClient app.
- Tap the Add Server button. Alternatively, navigate to Settings → NZBGet Servers and tap the + button in the top right corner.
Default Setup

Follow these steps for the default setup:
- Enter the IP address you found earlier into the Host field, without
http://orhttps://. For example:192.168.1.30 - Enter the port number, which can be found in your NZBGet security settings under ControlPort. If you're using the default port of
6789, this field can be left blank.
Scroll down to the Authorization section:
- Enter the username and password configured in your NZBGet security settings under ControlUsername and ControlPassword.
Tap Test & Save to start using NZBClient.
Ultra and Premium users can add as many servers as they like by navigating to Settings → NZBGet Servers and tapping the + button in the top right corner.
Advanced Setup (Optional)
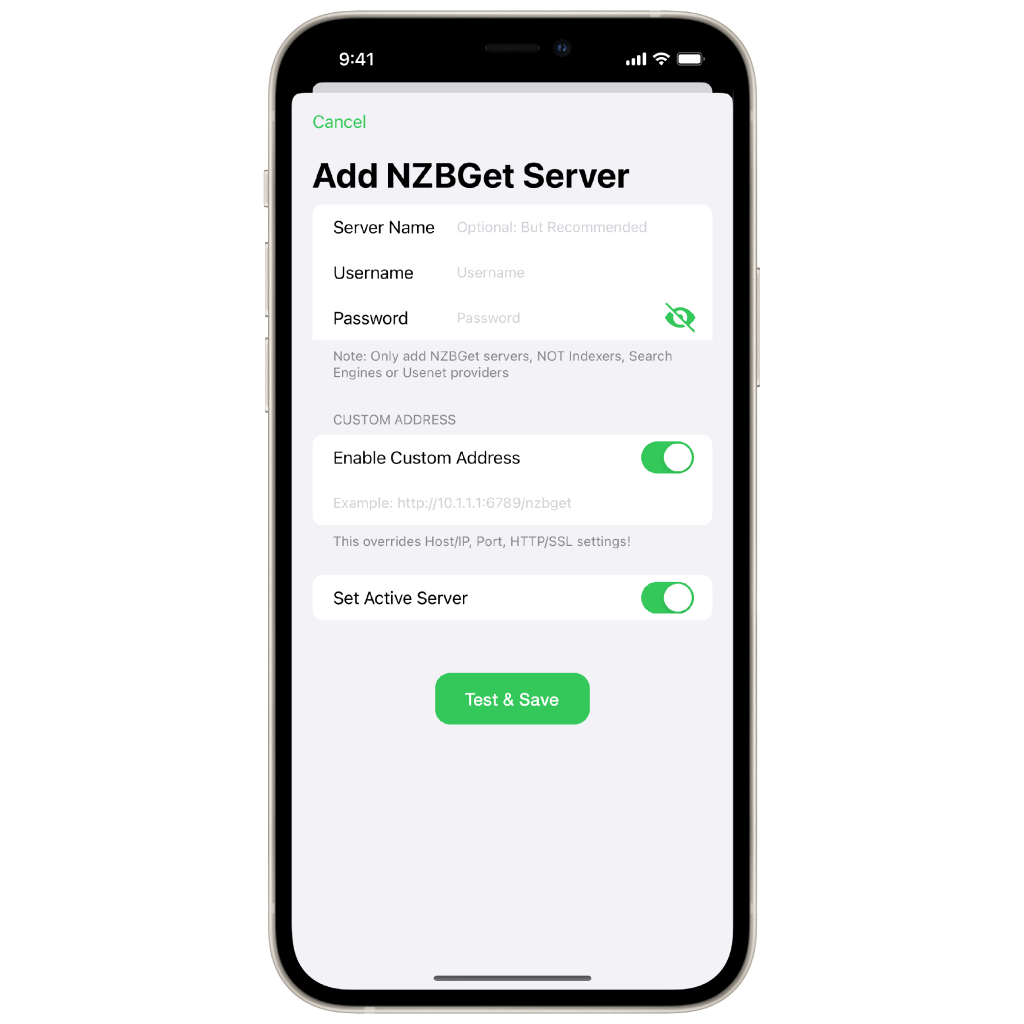
If you have a more advanced setup — such as port forwarding or a reverse proxy — you may want to use the Custom Address option. This overrides the Host, Port, and HTTPS settings.
Enable Use Custom Address and enter your address in the following format:
https://example.com:6789/nzbget
If your reverse proxy requires authentication and NZBGet also has a username and password configured, you can enter your proxy credentials in the Username/Password fields and embed your NZBGet credentials directly in the URL:
https://username:[email protected]
Security

If you connect to your NZBGet server over HTTPS/SSL, you'll need to enable this in the Security section. If you're using a custom address, simply prefix it with https:// — the Secure Control toggle is not available for custom addresses.
SSL Verification
SSL Verification has three options: Trust All, Strict, and Pinned.
- Trust All — Does not validate the server certificate. Use this only with self-signed certificates.
- Strict — Only trusts certificates signed by a recognised root authority (e.g. Let's Encrypt). This is the default.
- Pinned — Only trusts a specific certificate that you provide.
The default setting is Strict, which will not work with self-signed certificates. If you're using a self-signed certificate, switch to Trust All — your connection will still be encrypted, just without certificate validation.
Certificate Pinning

For an additional layer of security, you can pin your self-signed certificate instead.
To pin your certificate, select Pinned, tap the certificate field, and either import your certificate from Files or paste the raw certificate text from your clipboard.
You should pin the same certificate you entered in NZBGet Settings -> Security -> SecureCert or the certificate you used for your reverse proxy.
Note: Certificates imported into the app are saved to your devices Keychain.
Custom Headers

The app supports custom headers, which can be used with both the default and custom address configurations.
Custom headers are added to every request sent to NZBGet, making them useful for things like API key authentication on a reverse proxy — for example: x-api-key: some-secure-header-value
Note: Do not use the Authorization header as a custom header. The app uses this header internally to authenticate with NZBGet, and overriding it may cause login issues.